 The new dog truck
With Fall just around the corner, Eric and I are beginning to wrap up the summer's "dog projects." The biggest of these projects concerns the dogs' (and our) new transportation, our new dog truck.
The new dog truck is a 2010 5.7L 4WD Toyota Tundra, extra cab, long box (bed) pick up truck. The types of vehicles that mushers use to carry their dogs varies quite a bit based on the total number of dogs they need to carry and in what types of conditions. Some mushers use vans, some use SUVs, some use box trucks, and some use trailers. By far, however, the vast majority of mushers use pick up trucks, either with or without the bed, with dog boxes built on the back. This is the system we are now using.
 The new Toyota Tundra dog truck
As part of the conversion to the a new dog truck, summer project number one was to purchase the truck and then begin construction on the boxes. In searching for the truck, we test drove, researched and evaluated four trucks and many varieties (engine size) of those trucks including Ford 150, Dodge Ram 1500, Chevy Silverado, and the Toyota Tundra. The Toyota Tundra 5.7L won out with the Chevy Silverado a close second. While we did consider a 6.5 foot bed (the standard sized bed for a double/extended cab pick up) we ultimately decided that a long box (8 foot bed) was required and better served the truck's function as a dog truck. The Tundra was purchased from Russel Toyota in Baltimore, Maryland. The purchase went fairly smoothly.
At the end of June we purchased the Tundra. During the month of July, we built an 8-dog box with boxes large enough to double dogs should we ever need to carry up to 16 dogs! The biggest issue with the construction process was that we were under a very tight time line because we really wanted to make it to Eric's family reunion in Maine. We did miss the reunion this year but did make it to Maine, leaving only two days later than anticipated. Eric estimates that the total time spent building the boxes was approximately 250-300 hours (that's a lot of time on top of a full time job all done between July 1st and July 31st). We spent an additional 50-60 hours researching different dog box configurations, drawing up plans, and sourcing and purchasing materials. Most of the materials were not "off the shelf" components from Home Depot/Lowes. Most were specialty items that had to be ordered, purchased, and delivered. We did make several trips to Grainger and Fastenal for various components. The Southco T-Handle marine polished stainless latches were sourced through ebay and shipped from Florida. The metals and plastics came from several different places in Maryland and Delaware. Let's just say, we visited some very industrial Baltimore and Wilmington locations. We also purchased various specialized grinding wheels, drill bits, rivets, riveters, tips for the plasma cutter, and welding supplies.
 Double boxing already!
The boxes Eric designed and built are framed in steel, insulated with one inch foam insulation, lined in HDPE (high density poly ethylene) plastic, outfitted with stainless steel hardware including Southco (marine grade) polished stainless T-handle latches, and finished in polished, aluminum diamond plate. The boxes rest on a frame made of welded steel that is bolted to the frame of the truck.
 Day 1: Welding the box frame (this is when welding was still fun)
 Grinding
 Clamping the frame so it can be welded.
Steel box frame with door frames


Another side of the box frame with door frames
 All framed up with cross bracing
 The bed frame: the boxes rest on this frame which is bolted to the frame of the truck via the bed bolts
 Mounting bracket on the box frame: The bracket connects the boxes to the bed frame
 All framed up with cross bracing
 The bed frame: the boxes rest on this frame which is bolted to the frame of the truck via the bed bolts
 Mounting bracket on the box frame: The bracket connects the boxes to the bed frame
 Test fitting the box frame to the back of the truck and the bed frame: A two ton hoist was used to put the frame (and the finished boxes) on the truck.
 Insulating the bottom of the boxes and cutting and fitting the HDPE that lines the boxes
 Dog box lined on four sides with HDPE. The hole in the bottom allows access to the mounting brackets and bolts. The holes were latter plugged with rubber stoppers.
Test fitting diamond plate for doors


Cutting door holes in the sides of the diamond plate with the plasma cutter
 Riveting the sides on the dog box. Over the course of the project we used two full boxes of rivets, several different rivet sizes, and three separate riveters including an air driven riveter and the mechanical one you see Eric using in this photo.
 Once holes were cut in the diamond plate for the grate and the latch, the edges were smoothed using a grinder and file.
 Four doors hung: As you can see, the hinges were originally hung on the back side of the door. Although this gave a cleaner look, it also allowed the doors to gap at the side closest to the hinge. Stay tuned for how we fixed that little problem.
 Another photo of the side of the box
 Close up of the back side of a door and the expanded aluminum grate
 Close up of the Southco T-Handle latches in polished stainless steel
 Rubber Southco latch that holds up the door guards. We later added a second rubber Southco latch to each side for extra security.
 Cable that holds the door guards in the down position
 Re-mounting the doors with the aluminum ribbon hinges on the outside to minimize the gap. While it's not quite as clean looking, we really did not want the box doors leaking (and they don't). This is how we fixed the problem of doors that gapped on the side closest to the hinges.
 Painted bed frame: This is the area where we will install the pull out drawer. It's a huge storage space.
 Acadia's new dog box
 Interior of one of the new dog boxes--the rubber stopper covers the hole used to access the bolts that mount the boxes to the bed frame.

 Riveting the sides on the dog box. Over the course of the project we used two full boxes of rivets, several different rivet sizes, and three separate riveters including an air driven riveter and the mechanical one you see Eric using in this photo.
 Once holes were cut in the diamond plate for the grate and the latch, the edges were smoothed using a grinder and file.
 Four doors hung: As you can see, the hinges were originally hung on the back side of the door. Although this gave a cleaner look, it also allowed the doors to gap at the side closest to the hinge. Stay tuned for how we fixed that little problem.
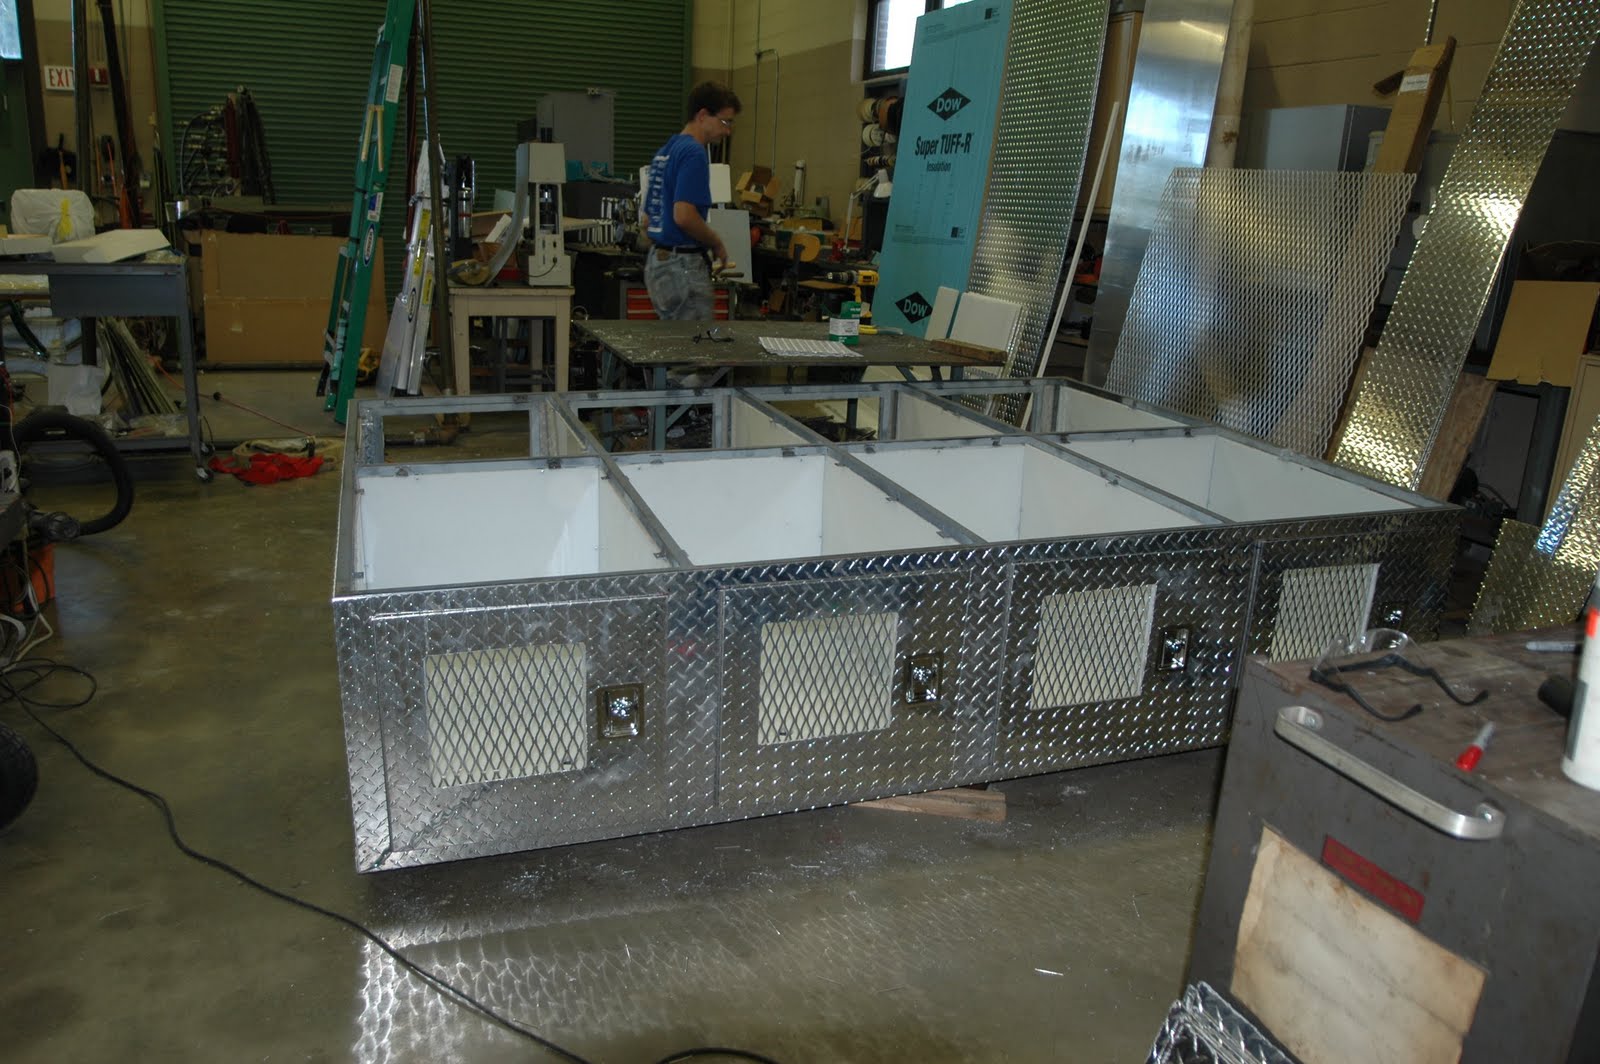 Another photo of the side of the box
 Close up of the back side of a door and the expanded aluminum grate
 Close up of the Southco T-Handle latches in polished stainless steel
 Rubber Southco latch that holds up the door guards. We later added a second rubber Southco latch to each side for extra security.
 Cable that holds the door guards in the down position
 Re-mounting the doors with the aluminum ribbon hinges on the outside to minimize the gap. While it's not quite as clean looking, we really did not want the box doors leaking (and they don't). This is how we fixed the problem of doors that gapped on the side closest to the hinges.
  Painted bed frame: This is the area where we will install the pull out drawer. It's a huge storage space.
 Acadia's new dog box
 Interior of one of the new dog boxes--the rubber stopper covers the hole used to access the bolts that mount the boxes to the bed frame.
Looking down the side of the truck with the door guards open: We added a second Southco rubber latch for the door guards to better secure the door guards when traveling.
We will finish off the project with a pull out drawer for the bed of the truck that will ride below the dog boxes. This "drawer" will be used to carry gear, the dogs and ours. Ultimately, should we ever need or want to remove the bed of the truck, we could build another course of dog boxes that would allow us to to have a 16 hole (box) truck. At present, we're in the process of adding outriggers for picketing the dogs and a sled rack for carrying our dog sleds. We'll also be designing and building a ramp for loading some of our heavier dogs. We'll continue to use the hitch mounted carrier that Eric designed and built to carry our Fritz Dyck rigs (dog sleds on wheels). (For information on where we purchase our rigs, please visit the resources page of our website). We were pleased to learn last night that the hitch carrier will fit into the new dog truck's hitch without any modifications.
The new dog truck has now been through its "sea trial" phase and just returned from our Up North Summer Adventures. Along the way, we made a couple of changes, adding additional hinges to the door guards to add additional support and running a protective strip of rubber tubing along the back edge of the door guards. We may also add a locking latch to the door guard on each side so that the dogs don't break curfew! We were pleasantly surprised by how comfortable the dogs were riding in their boxes and how cool the dogs were during the long ride to and from Maine. All in all, we are just thrilled with our new dog truck. To see additional photos of the new dog truck, check out our Facebook page.
 At the cabin up in Maine
 Looking down the side of the truck at the cabin up in Maine. The full HDPE plastic slides are used to keep dust, dirt, and rain from entering the boxes when the truck is parked. A second set of vented slides is available for use to "warm" up the boxes when traveling on particularly cold days.


 Posts
Posts

